- Required Dependencies
- https://umod.org/plugins/image-library
Create your own custom sprays which players can craft through a UI menu
This plugin comes with a tool to create your own sprays and upload them to Steam workshop

Features
Crafting menu as shown above
Customizable crafting costs per spray
Optional permission per spray
Commands to give cans to players
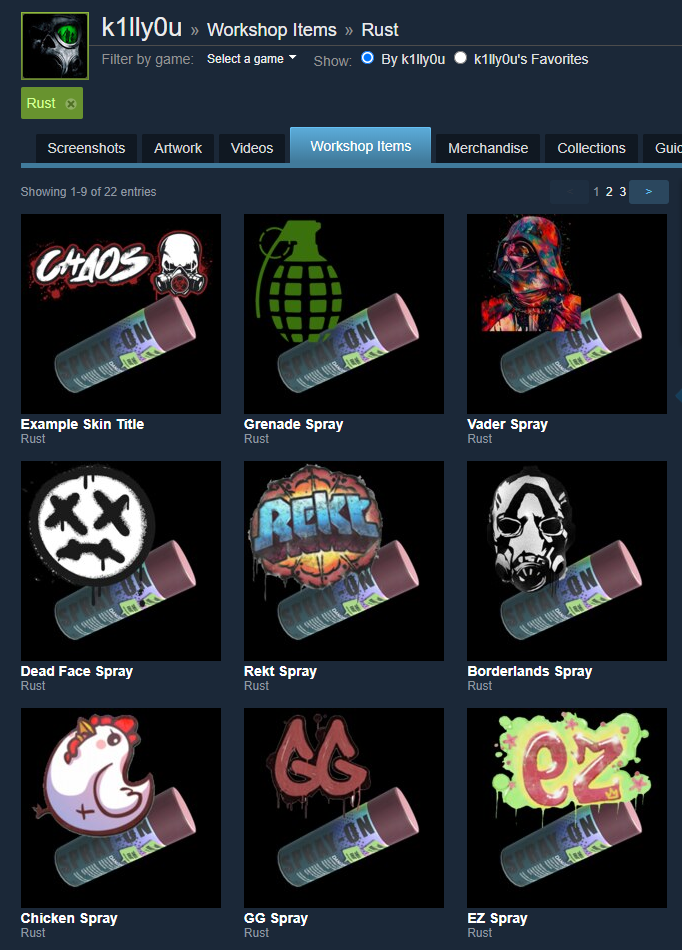
Comes with a handful of pre-created sprays
Set up so skinned spray cans can be inserted in to your loot table and still work
Skinned spray cans will only paint the skin that is assigned to them
External tool to create your own sprays and upload them to the workshop
Permissions
customsprays.admin - Required to access create/remove commands
customsprays.give - Allows access to /cs.giveme and /cs.giveto commands
customsprays.random - Allows access to /cs.giverandom command
customsprays.craft - Allows access to /cs.craft command
customsprays.nocraftcost - Players with this permission pay no crafting cost
Chat Commands
/cs - Shows help menu with available commands for the player
/cs.craft - Opens the crafting menu
/cs.giveme <name-or-workshopID> - Give yourself a the specified spray can
/cs.giveto <playername-or-usedID> <name-or-workshopID> - Give the target player the specified spray can
/cs.giverandom - Give yourself a random spray can
/cs.giverandom <playername-or-usedID> - Give the target player a random spray can
/cs.createspray <name> <workshopID> - Add a new spray to the config
/cs.removespray <name-or-workshopID> - Remove the specified spray from the config
Console Commands
cs.createspray <name> <workshopID> - Add a new spray to the config
cs.removespray <name-or-workshopID> - Remove the specified spray from the config
How to create your own spray
The various sprays built in to Rust are workshop items, however by default you can not create your own and upload it, so I have created a tool that does it for you.
The decal uploader will only run on windows and requires .NET Core 3.1.

 dotnet.microsoft.com
To use the decal uploader you will need to have Steam open on your PC, and have a valid copy of Rust!
First step is to extract the contents of the .zip file downloaded here to some where on your PC.
To create a custom skin.
Download the template from https://chaoscode.io/oxide/SkinTemplate.zip and extract the .zip file somewhere on your PC
In this file there are 3 images;
_MainTex0.png (1024x1024)
icon.png (512x512)
icon_background.png (512x512)
_MainTex0 is the decal itself, the other 2 are item icons.
Modify these how ever you see fit, but do not change the dimensions of the images.
Keep track of the folder path to this folder, you will need it in the next step
To upload the custom skin
In the extracted file there is a folder called 'Decal Uploader'
Run 'DecalUploader.exe', it will open a command prompt.
First you will be prompted to enter a name for the skin
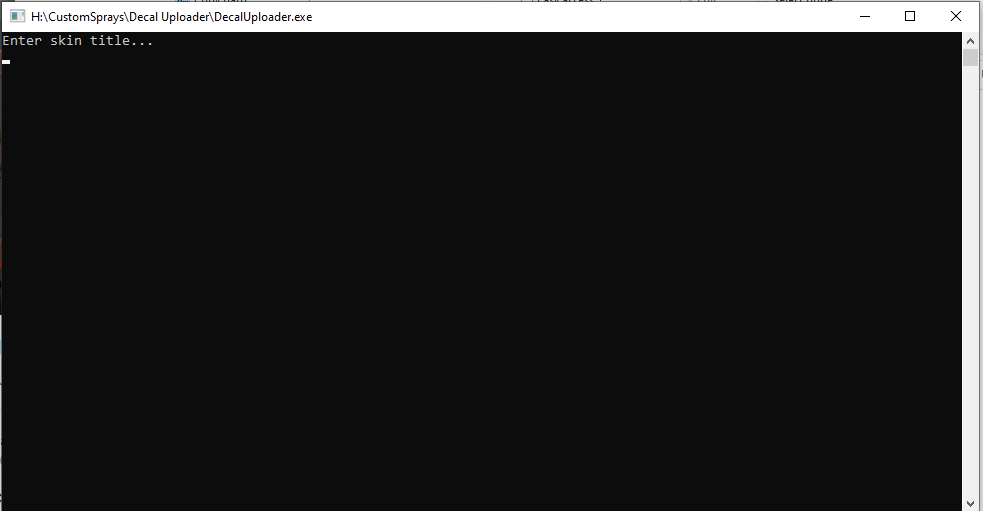
Enter the name of the decal and press enter
Next you will be prompted to enter the folder path. This is the path to your custom skin images from the previous step
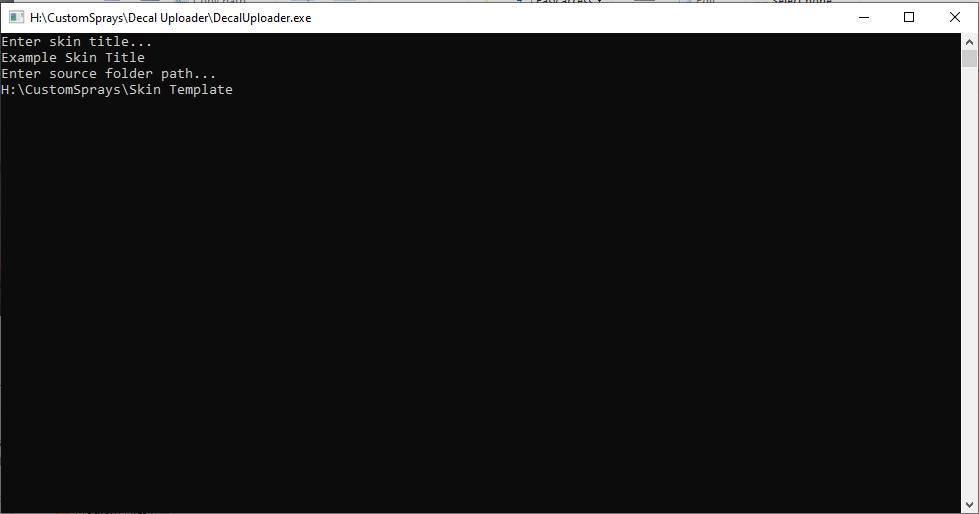
Once you have entered the folder path just wait a few moments for the skin to upload.
When it has finished uploading you will see some details about the upload and the skin will be in your personal workshop.
Before you close this window copy the workshop ID to your clipboard
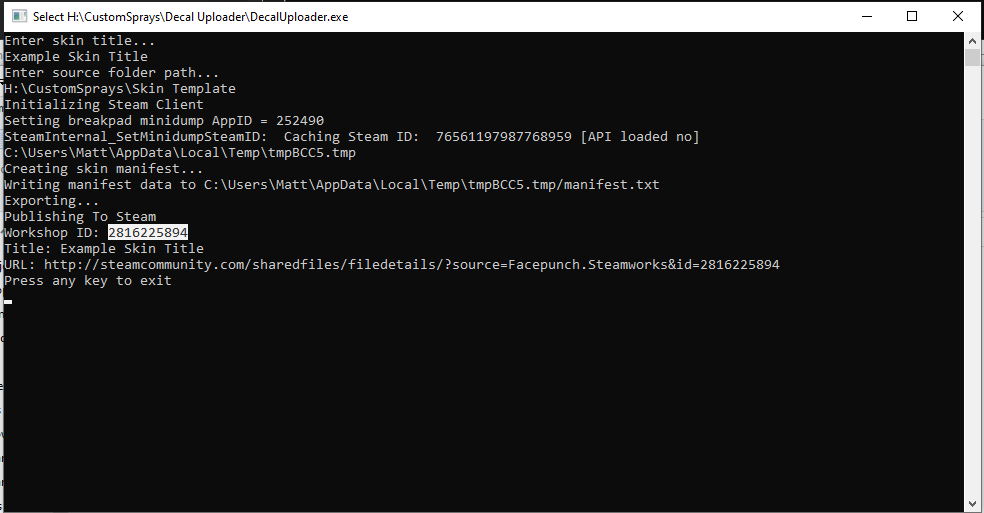
Now either use the chat or console commands provided to add the skin to the plugin.
ex. 'cs.createspray Example 2816225894'
That's it, the skin is now in your config file where you can edit additional details such as permission, costs or specify a URL for the image shown in the UI menu
Config
This plugin comes with a tool to create your own sprays and upload them to Steam workshop
Features
Crafting menu as shown above
Customizable crafting costs per spray
Optional permission per spray
Commands to give cans to players
Comes with a handful of pre-created sprays
Set up so skinned spray cans can be inserted in to your loot table and still work
Skinned spray cans will only paint the skin that is assigned to them
External tool to create your own sprays and upload them to the workshop
Permissions
customsprays.admin - Required to access create/remove commands
customsprays.give - Allows access to /cs.giveme and /cs.giveto commands
customsprays.random - Allows access to /cs.giverandom command
customsprays.craft - Allows access to /cs.craft command
customsprays.nocraftcost - Players with this permission pay no crafting cost
Chat Commands
/cs - Shows help menu with available commands for the player
/cs.craft - Opens the crafting menu
/cs.giveme <name-or-workshopID> - Give yourself a the specified spray can
/cs.giveto <playername-or-usedID> <name-or-workshopID> - Give the target player the specified spray can
/cs.giverandom - Give yourself a random spray can
/cs.giverandom <playername-or-usedID> - Give the target player a random spray can
/cs.createspray <name> <workshopID> - Add a new spray to the config
/cs.removespray <name-or-workshopID> - Remove the specified spray from the config
Console Commands
cs.createspray <name> <workshopID> - Add a new spray to the config
cs.removespray <name-or-workshopID> - Remove the specified spray from the config
How to create your own spray
The various sprays built in to Rust are workshop items, however by default you can not create your own and upload it, so I have created a tool that does it for you.
The decal uploader will only run on windows and requires .NET Core 3.1.

Download .NET Core 3.1 (Linux, macOS, and Windows)
.NET Core 3.1 downloads for Linux, macOS, and Windows. .NET is a free, cross-platform, open-source developer platform for building many different types of applications.
To use the decal uploader you will need to have Steam open on your PC, and have a valid copy of Rust!
First step is to extract the contents of the .zip file downloaded here to some where on your PC.
To create a custom skin.
Download the template from https://chaoscode.io/oxide/SkinTemplate.zip and extract the .zip file somewhere on your PC
In this file there are 3 images;
_MainTex0.png (1024x1024)
icon.png (512x512)
icon_background.png (512x512)
_MainTex0 is the decal itself, the other 2 are item icons.
Modify these how ever you see fit, but do not change the dimensions of the images.
Keep track of the folder path to this folder, you will need it in the next step
To upload the custom skin
In the extracted file there is a folder called 'Decal Uploader'
Run 'DecalUploader.exe', it will open a command prompt.
First you will be prompted to enter a name for the skin

Enter the name of the decal and press enter
Next you will be prompted to enter the folder path. This is the path to your custom skin images from the previous step

Once you have entered the folder path just wait a few moments for the skin to upload.
When it has finished uploading you will see some details about the upload and the skin will be in your personal workshop.
Before you close this window copy the workshop ID to your clipboard

Now either use the chat or console commands provided to add the skin to the plugin.
ex. 'cs.createspray Example 2816225894'
That's it, the skin is now in your config file where you can edit additional details such as permission, costs or specify a URL for the image shown in the UI menu

Config
JSON:
{
  "Spray can condition loss per spray": 10.0,
  "Custom Sprays": [
    {
      "Spray can name": "Chaos Spray",
      "Spray can workshop ID": 2816217790,
      "Image URL": "https://chaoscode.io/oxide/Images/sprays/chaos-logo-icon.png",
      "Required permission (must start with 'customsprays.')": "",
      "Crafting Costs": [
        {
          "Shortname": "metal.fragments",
          "Amount": 100
        }
      ]
    },
    {
      "Spray can name": "EZ Spray",
      "Spray can workshop ID": 2816218452,
      "Image URL": "https://chaoscode.io/oxide/Images/sprays/ez-icon.png",
      "Required permission (must start with 'customsprays.')": "",
      "Crafting Costs": [
        {
          "Shortname": "metal.fragments",
          "Amount": 100
        }
      ]
    },
    {
      "Spray can name": "GG Spray",
      "Spray can workshop ID": 2816218516,
      "Image URL": "https://chaoscode.io/oxide/Images/sprays/gg-icon.png",
      "Required permission (must start with 'customsprays.')": "",
      "Crafting Costs": [
        {
          "Shortname": "metal.fragments",
          "Amount": 100
        }
      ]
    },
    {
      "Spray can name": "Chicken Spray",
      "Spray can workshop ID": 2816218582,
      "Image URL": "https://chaoscode.io/oxide/Images/sprays/chicken-icon.png",
      "Required permission (must start with 'customsprays.')": "",
      "Crafting Costs": [
        {
          "Shortname": "metal.fragments",
          "Amount": 100
        }
      ]
    },
    {
      "Spray can name": "Borderlands Spray",
      "Spray can workshop ID": 2816218649,
      "Image URL": "https://chaoscode.io/oxide/Images/sprays/borderlands-icon.png",
      "Required permission (must start with 'customsprays.')": "",
      "Crafting Costs": [
        {
          "Shortname": "metal.fragments",
          "Amount": 100
        }
      ]
    },
    {
      "Spray can name": "Rekt Spray",
      "Spray can workshop ID": 2816218741,
      "Image URL": "https://chaoscode.io/oxide/Images/sprays/rekt-icon.png",
      "Required permission (must start with 'customsprays.')": "",
      "Crafting Costs": [
        {
          "Shortname": "metal.fragments",
          "Amount": 100
        }
      ]
    },
    {
      "Spray can name": "Dead Face Spray",
      "Spray can workshop ID": 2816218839,
      "Image URL": "https://chaoscode.io/oxide/Images/sprays/dead-face-icon.png",
      "Required permission (must start with 'customsprays.')": "",
      "Crafting Costs": [
        {
          "Shortname": "metal.fragments",
          "Amount": 100
        }
      ]
    },
    {
      "Spray can name": "Vader Spray",
      "Spray can workshop ID": 2816218952,
      "Image URL": "https://chaoscode.io/oxide/Images/sprays/vader-icon.png",
      "Required permission (must start with 'customsprays.')": "",
      "Crafting Costs": [
        {
          "Shortname": "metal.fragments",
          "Amount": 100
        }
      ]
    },
    {
      "Spray can name": "Grenade Spray",
      "Spray can workshop ID": 2816219028,
      "Image URL": "https://chaoscode.io/oxide/Images/sprays/grenade-icon.png",
      "Required permission (must start with 'customsprays.')": "",
      "Crafting Costs": [
        {
          "Shortname": "metal.fragments",
          "Amount": 100
        }
      ]
    }
  ],
  "UI Options": {
    "Panel Color": {
      "Hex": "#232323",
      "Alpha": 1.0
    },
    "Disabled Color": {
      "Hex": "#3e3e42",
      "Alpha": 1.0
    },
    "Color 1": {
      "Hex": "#007acc",
      "Alpha": 1.0
    },
    "Color 2": {
      "Hex": "#6a8b38",
      "Alpha": 1.0
    },
    "Color 3": {
      "Hex": "#d85540",
      "Alpha": 1.0
    },
    "Color 4": {
      "Hex": "#d08822",
      "Alpha": 1.0
    }
  },
  "Version": {
    "Major": 0,
    "Minor": 1,
    "Patch": 0
  }
}